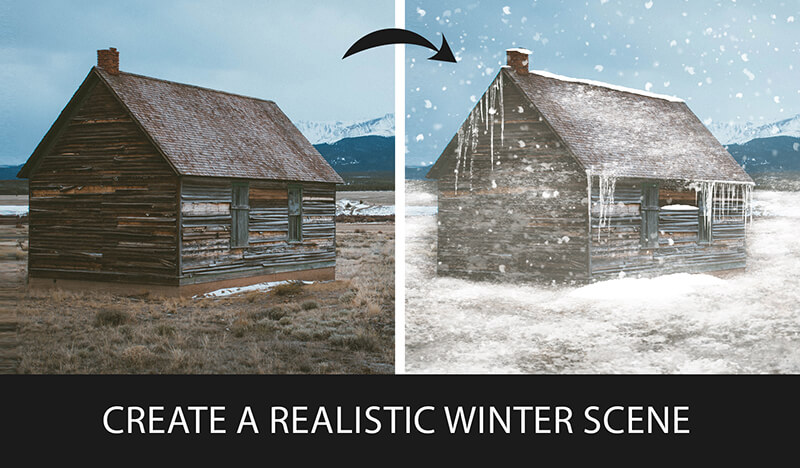
How to Create Snow in Photoshop
Do you want to create stunning snow scenes in your digital art? If so, you’re going to love this tutorial. I’ve created a brush set for snow in photoshop that you can use to add realistic snow Patch, Falling Snow, icicle, Fog, and snow-covered objects to your paintings. In this post, I’ll show you how to use these brushes to make a beautiful winter landscape in Photoshop. By the end of this tutorial, you’ll be able to create your own snow scenes with ease and confidence. Ready to get started? Let’s go!Tutorial Resources
Snow Brushes
Step 1: Open your image in Photoshop.
Step 2: Paint the snow on the ground.
Now that you have your image open, you can start painting the snow on the ground. To do this, you need to select the patch snow brush from my snow brush set. This brush will create a realistic snow texture that covers the original surface. To select the patch snow brush, go to the Brush Tool (B) and click on the Brush Preset Picker in the Options Bar. Then scroll down until you find the brush and click on it.

Step 3: Paint the snow on other objects.
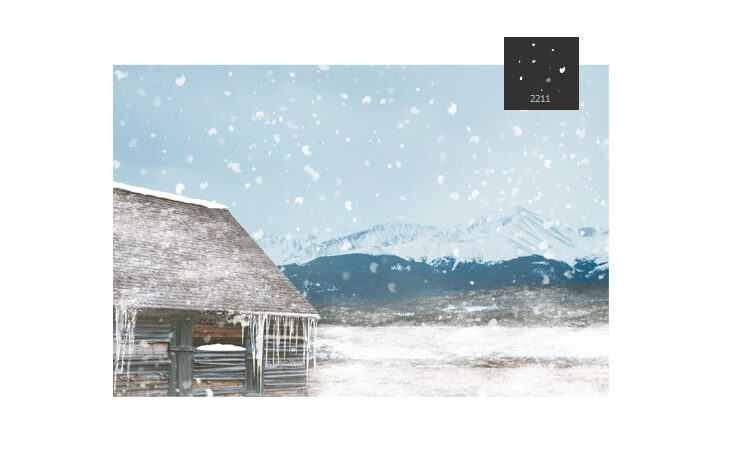
After you have painted the snow on the ground, you can use other patch brushes to cover other objects in your image, such as a car or a mountain. This patch brush is lighter and more transparent, so they will create a subtle snow effect that blends with the original color, select this Patch snow Brush to paint over the areas you want to cover. Be careful not to overdo it, as too much snow can make your image look unrealistic.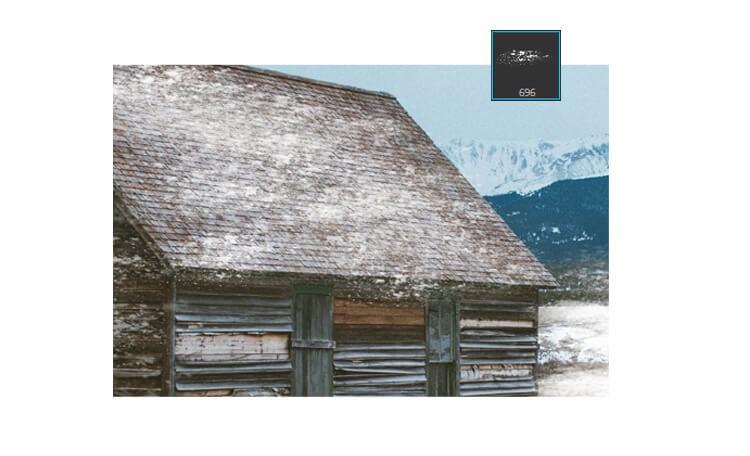
Step 4: Paint the icicles.
The next thing you can do is to paint some icicles on your image. Icicles are frozen water droplets that hang from the edges of roofs, windows, or other objects. They can add some interest and realism to your snow scene. To paint icicles, you need to use the icicle brush from my snow brush set. These brushes will help you to create different shapes and lengths of icicles.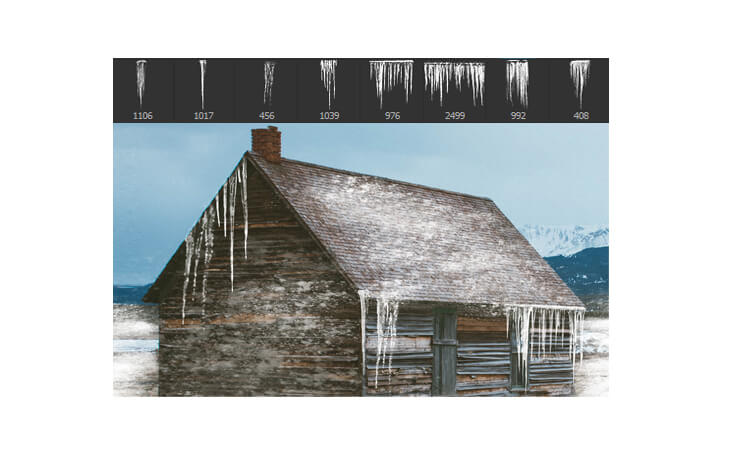
Step 5: Paint the fog.
Another way to enhance your snow scene is to paint some fog in the background. Fog is a thin layer of mist that reduces the visibility and creates a soft and mysterious atmosphere. To paint fog, you need to use the fog brush from my snow brush set. This brush will create a smooth and cloudy effect that fades the colors and details of the background. You can also adjust the brush size and opacity depending on how much fog you want to create. Be careful not to cover the foreground or the main focus of your image, as this can make your image look too blurry.
Step 6: Paint the falling snow.
The final touch you can add to your snow scene is to paint some falling snow in photoshop. Falling snow is a collection of snowflakes that drift down from the sky and create a sense of movement and depth. Select falling snow brush from my snow brush set. This brush will create a random pattern of small dots that resemble snowflakes.
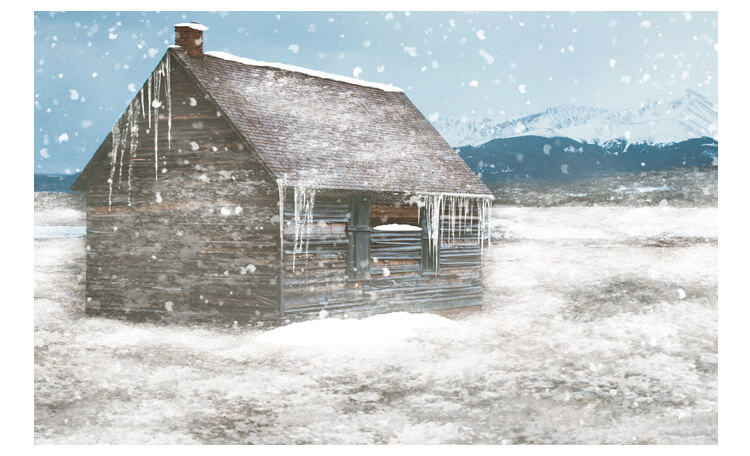
Finished!