Introduction Paint mud in Photoshop can enhance the authenticity of your digital landscapes and artworks. This tutorial will guide you through the process using our custom mud brushes, ensuring that you achieve stunning results every time. Whether you’re a novice or a seasoned artist, our step-by-step guide will make the process straightforward and enjoyable.
Tutorial Assets
Step 1: Select the color palettes
Select the color palettes To paint realistic mud with the brushes, you need to choose the right colors for your scene. You can use one of the five swatches palettes that come with the brushes or create your own custom palette.
Know the names of the colors Each palette has four colors that are named according to their role in the mud painting.

Step 2: Paint the base color
To use the brushes, you need to load them into Photoshop first, you need to create a new layer above the background layer.
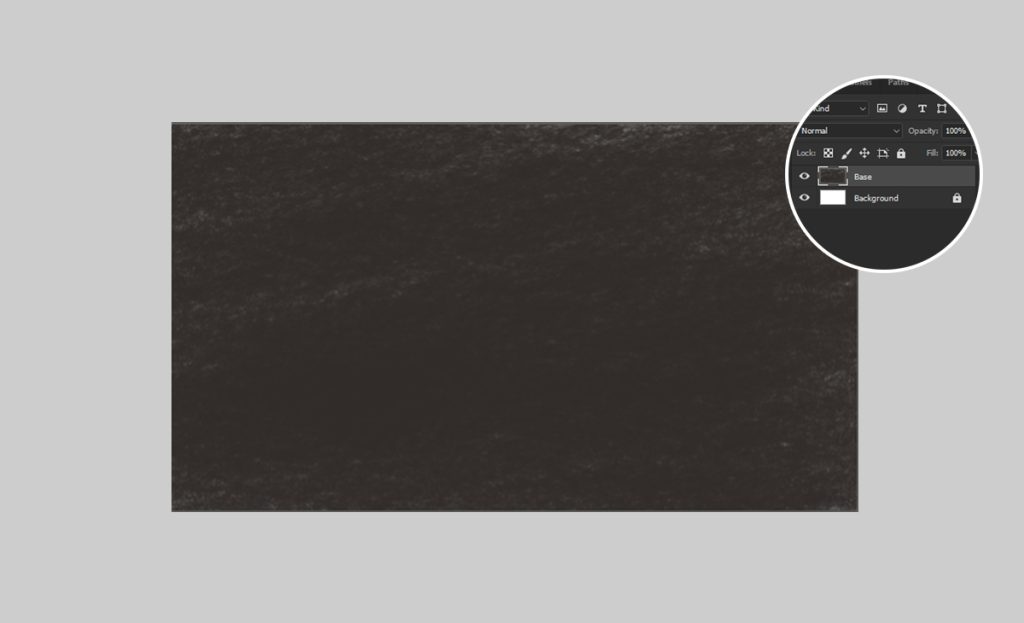
Paint the base color #2d2a26
This is the main color of the mud, usually a dark brown or gray. You will use this color to fill the background layer.
you need to create a new layer and use a brush with the color that you chose as the base. To create a new layer, go to Layer > New > Layer ( Ctrl+Shift+N on your keyboard)
Name the layer “Base” and click OK. Choose one of the mud brushes as you like.
To paint the base color, use the Brush Tool (B) and paint over the entire canvas with the mud brush. You can vary the pressure and direction of your strokes to create some texture and variation on the mud. You should now have a layer of mud color on your canvas.
Step 3: Paint the highlight
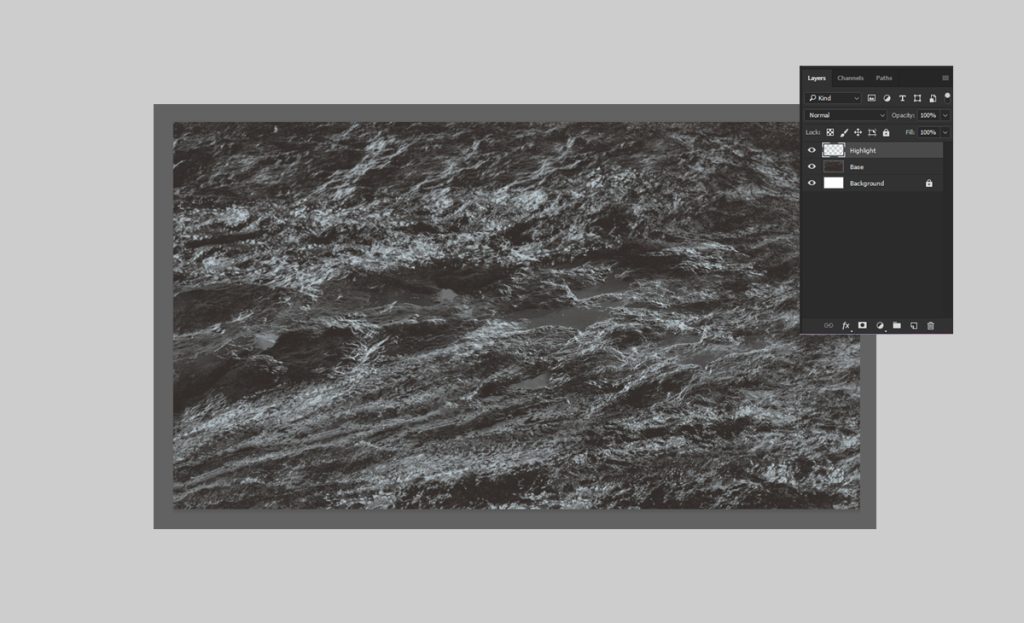
Create a layer to paint the highlight and use different Mud brushes with the color that you chose as the highlight. #c0cdd3
This is a slightly lighter color than the base. You will use this color to paint the highlights and contrast of the mud,
Name the layer “Highlight” You can use different brushes to create different effects and textures for the highlight.
Step 4: Paint the shadow
Paint “Shadow” #040301
This is the darkest color in the palette. You will use this color to paint the deepest and darkest parts of the mud, such as crevices, holes, or areas that are far from the light source. This step will make contrast and depth in your mud painting.
Note: Make sure that the dark colored layer (shadow) is under the light-colored layer (highlight) in the Layers panel.
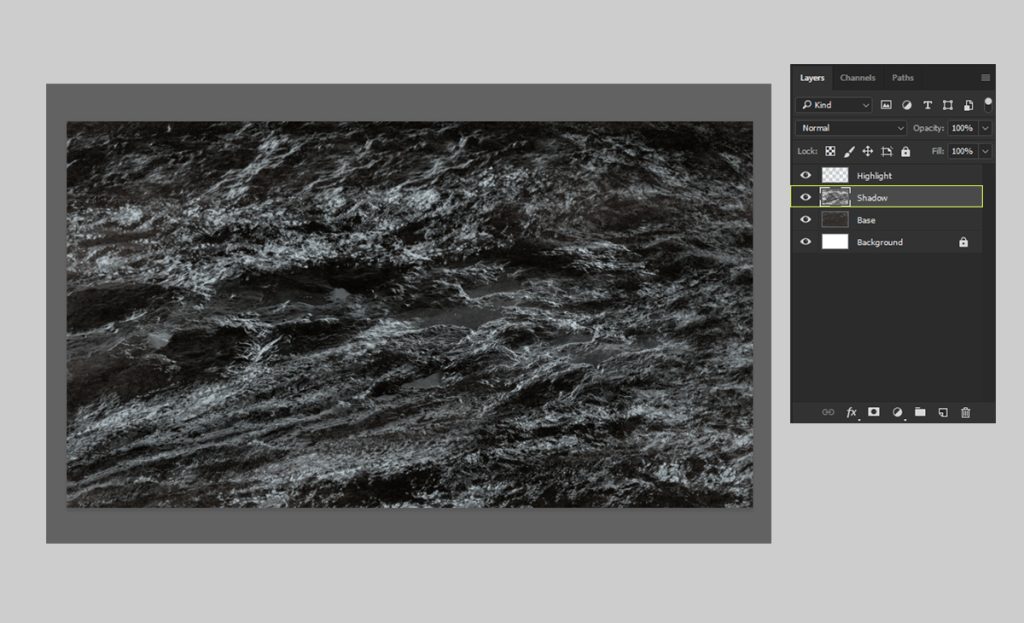
Arrange the layers to make your mud painting look realistic
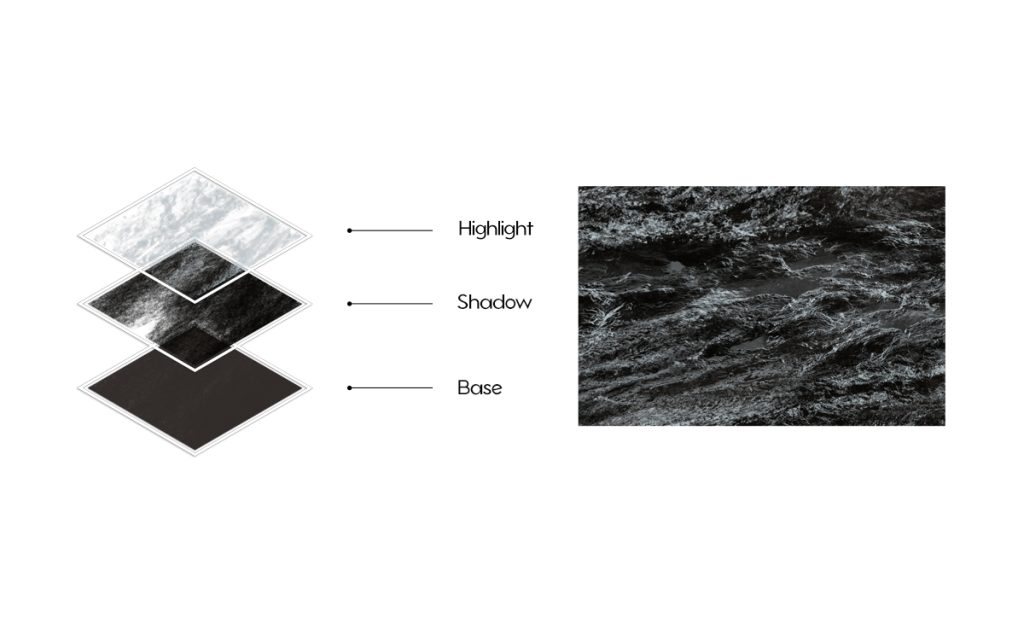
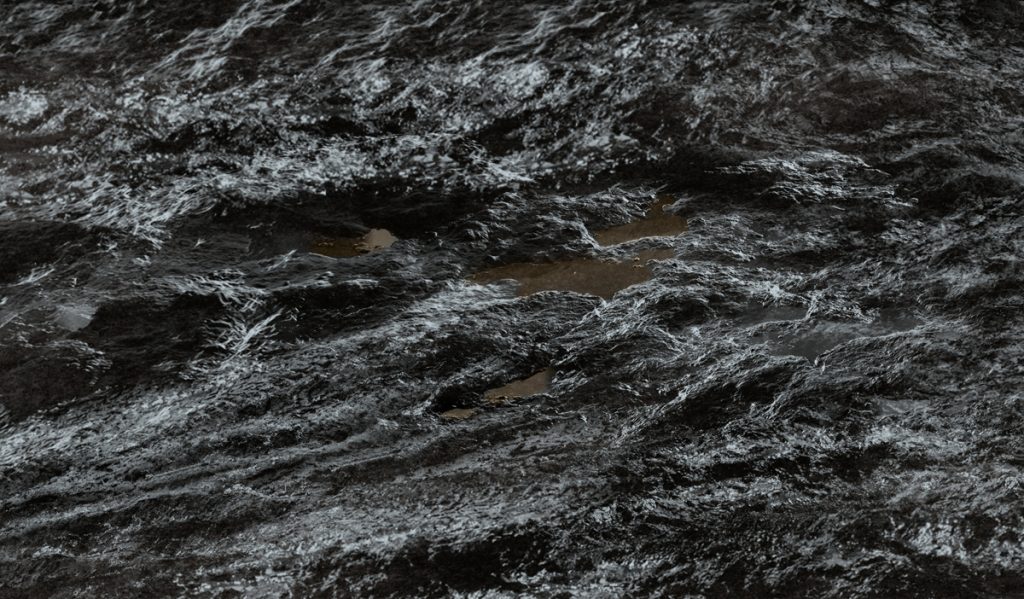
I hope this image inspires you to create your own mud paintings with Photoshop.
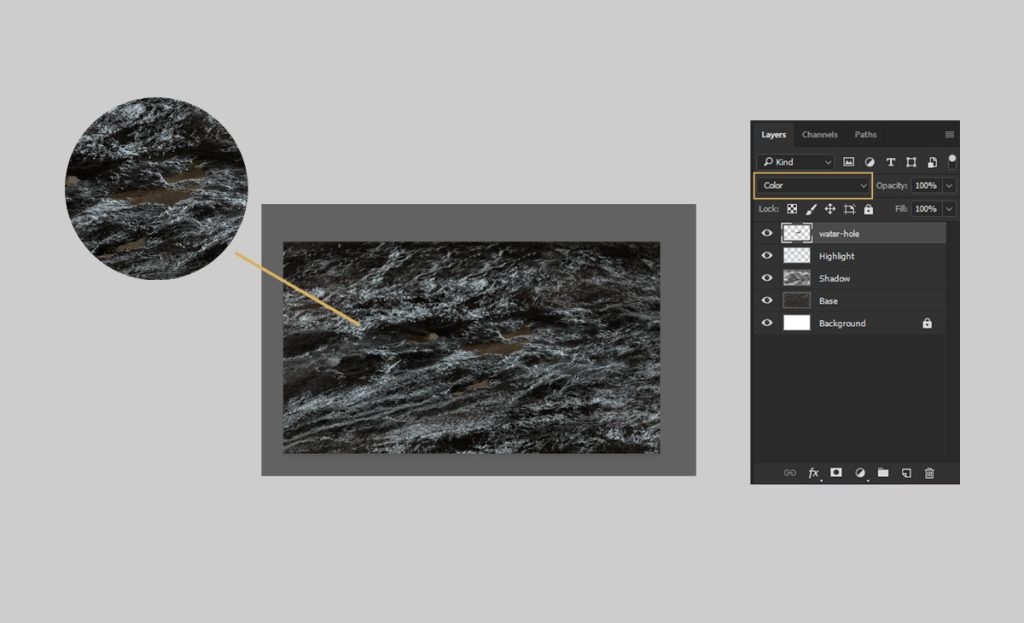
Step 5: Paint the mud hole
To paint the mud hole, you need to create a new layer and use a soft round brush with a Brown color #67573e
change the layer mode to color, go to the Layers panel and click on the drop-down menu.
Choose “Color” from the list
You have completed the tutorial on how to paint mud with Photoshop. You have learned how to use the mud brushes and the color palettes to create realistic and detailed mud effects. You have also learned how to paint a mud hole with a simple trick. You can use these techniques to create infinite scenes and scenarios with mud, such as swamps, deserts, battlefields, or anything else you can imagine.
