How to Install ABR brushes in Affinity Photo.
Introduction
Affinity Photo is a powerful photo editing software that supports various brush formats, including ABR (Adobe Brush) files. This guide will walk you through the steps to import and use ABR brushes in Affinity Photo, enhancing your digital artwork and photo editing capabilities.
Step 1: Download the ABR Brush File
Start by downloading the ABR brush file you want to use. Make sure to save it in an easily accessible location on your computer, such as the Downloads folder.
Step 2: Open Affinity Photo
Launch Affinity Photo on your computer. Ensure that you have the latest version of the software for optimal compatibility with ABR files.
Step 3: Access the Brushes Panel
To begin importing your brushes:
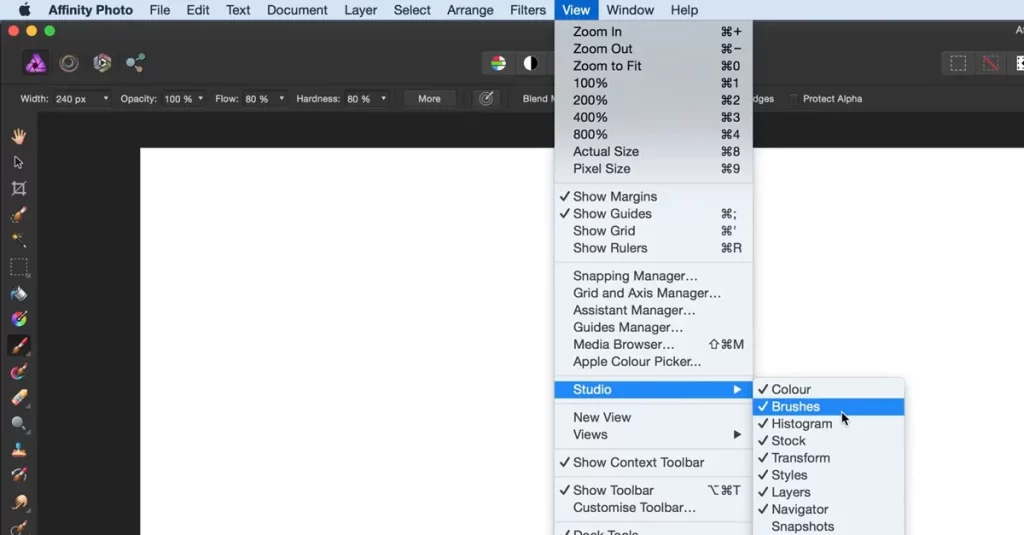
- Go to the View menu.
- Select Studio, then click on Brushes to open the Brushes Panel.

Step 4: Import the ABR Brushes
Follow these steps to import the ABR file:
- In the Brushes Panel, click on the Menu icon (three horizontal lines) at the top right corner.
- Select Import Brushes from the dropdown menu.

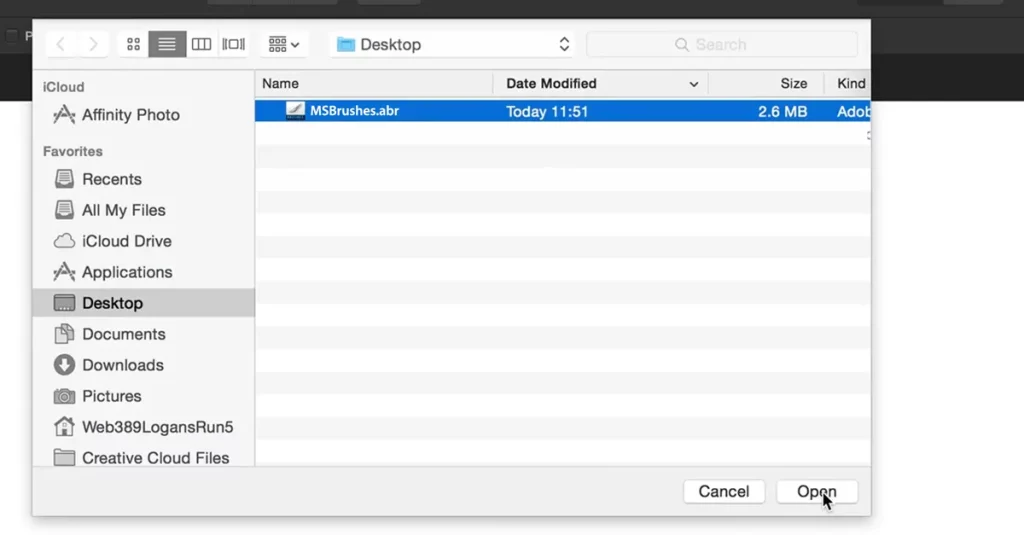
- Navigate to the location where you saved the ABR file.
- Select the ABR file and click Open. Affinity Photo will import the brushes into your Brushes Panel.

Conclusion
Installing ABR brushes in Affinity Photo is a straightforward process that greatly expands your creative possibilities.
By following these steps, you can easily import and use a variety of brushes to enhance your digital artwork and photo editing projects. Happy creating!
Learn how to import ABR brushes into Photoshop / How to import ABR Brushes into Procreate /How to Install ABR Brushes in GIMP


